SEALING, CAULKING AND DEADENER
SEALING & CAULKING
Note : Seal the following areas to prevent air leaks, water leaks and rust.
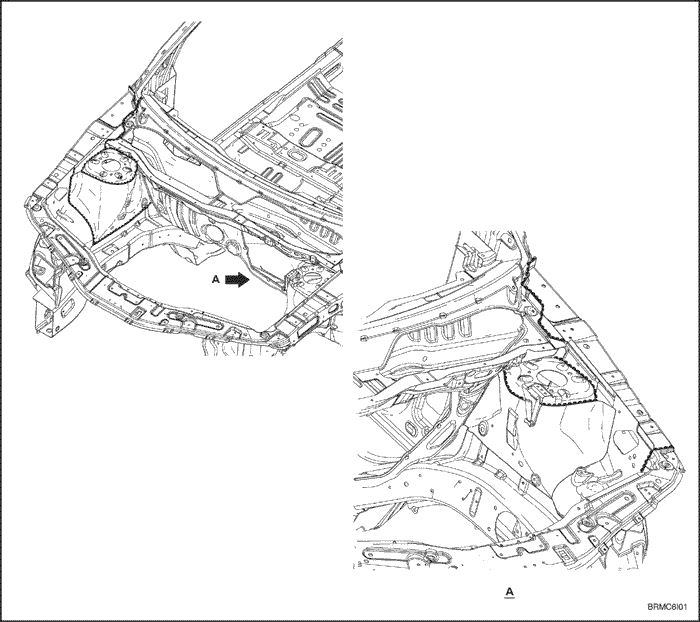
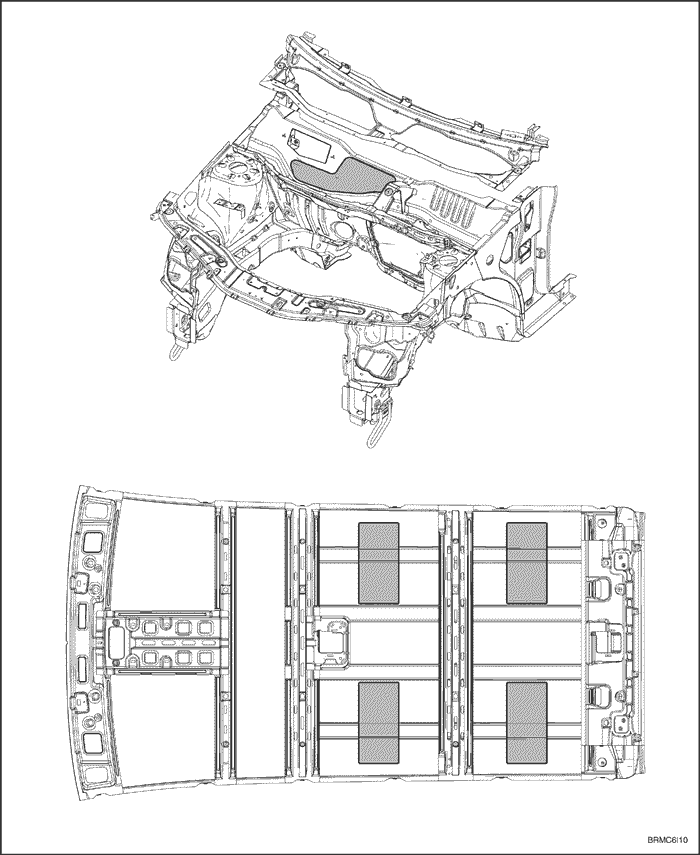
DASH
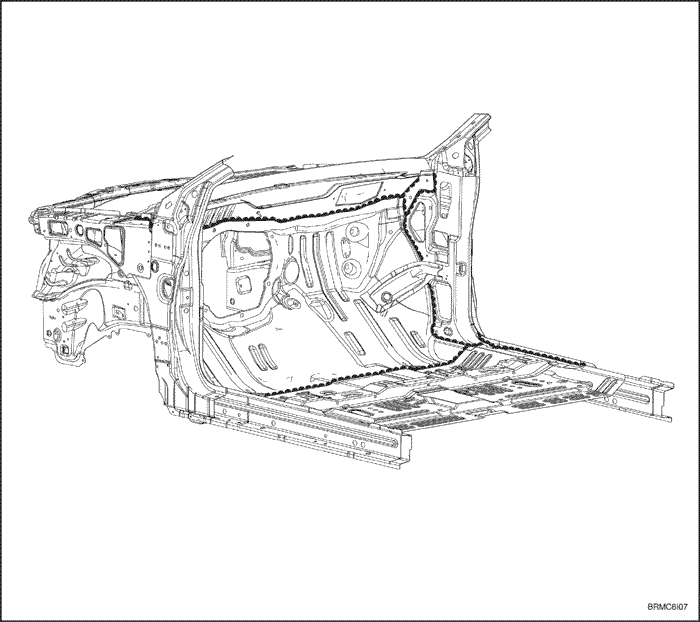
FLOOR & TRUNK ROOM
- Sealant to be wiped.
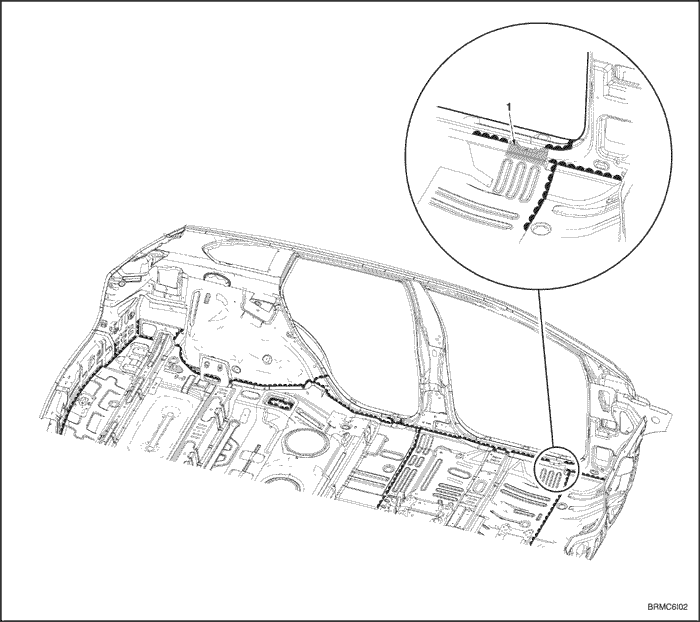
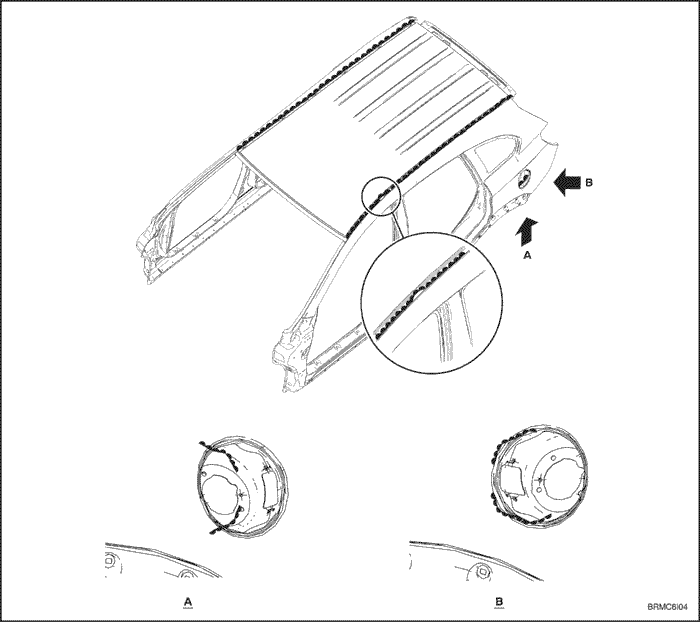
REAR LAMP & TRUNK ROOM
ROOF
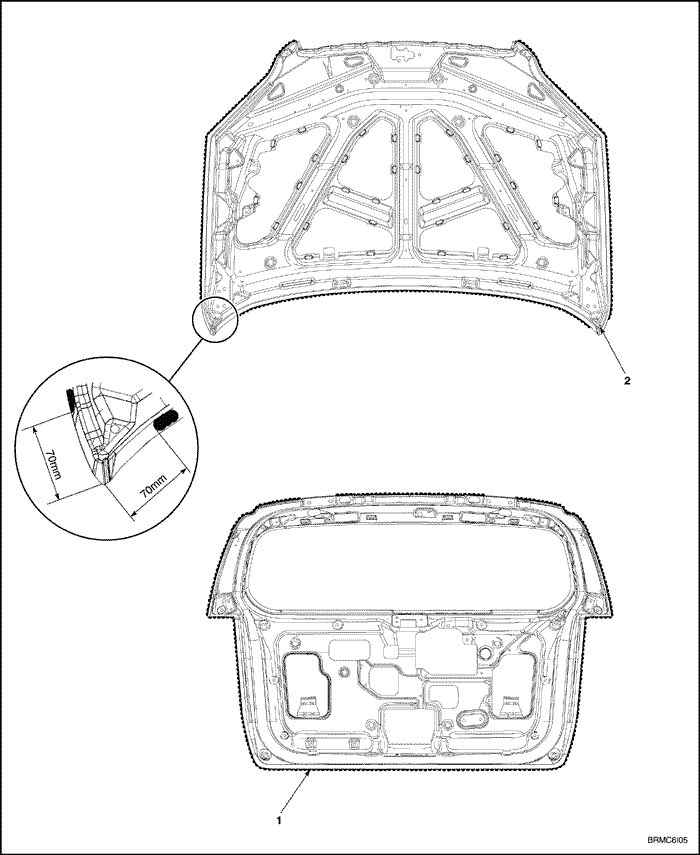
HOOD & TAILGATE
- Water drain holes to be free of sealer 3 places.
- Paint drain holes to be free of sealer.
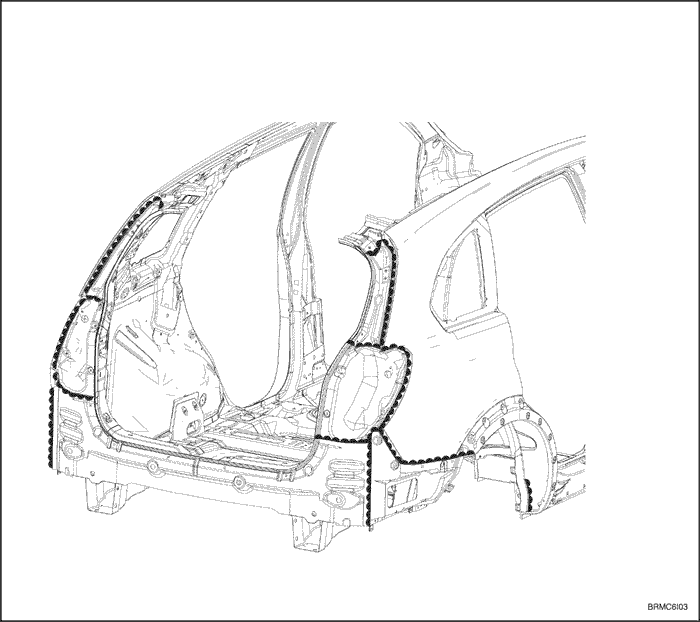
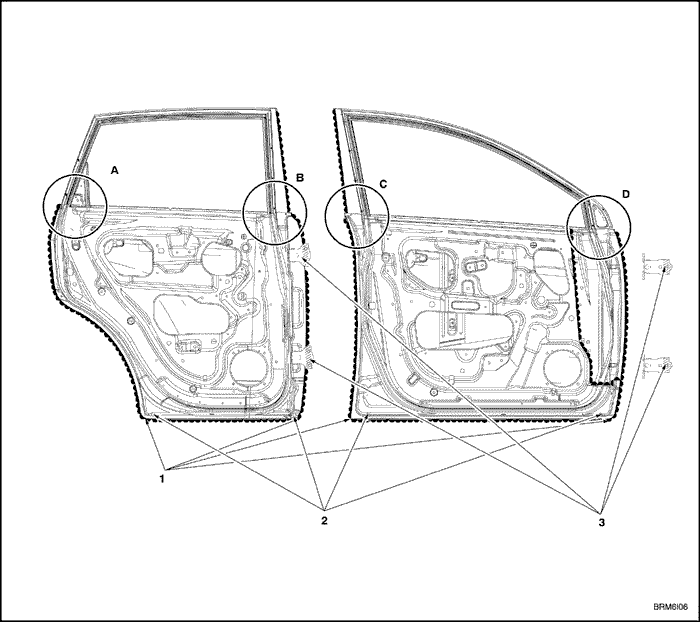
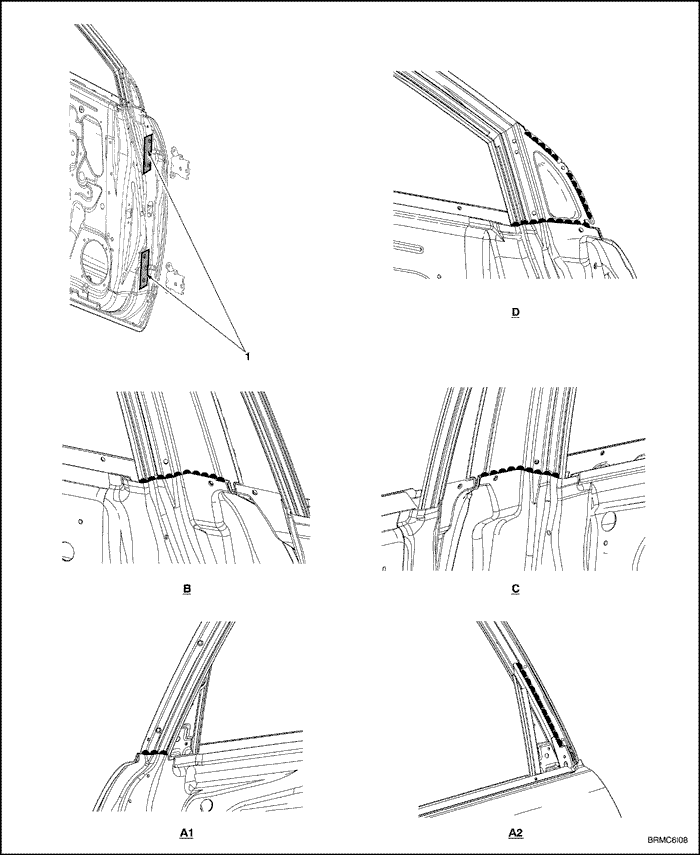
FRONT & REAR DOOR | Limit : mm |
- Sealant to be wiped around door corners.
- Water drain holes to be free of sealant 4 places.
- Bonded on the all hinge doors with sealant.
- Apply wax-door hinge (front & rear door).
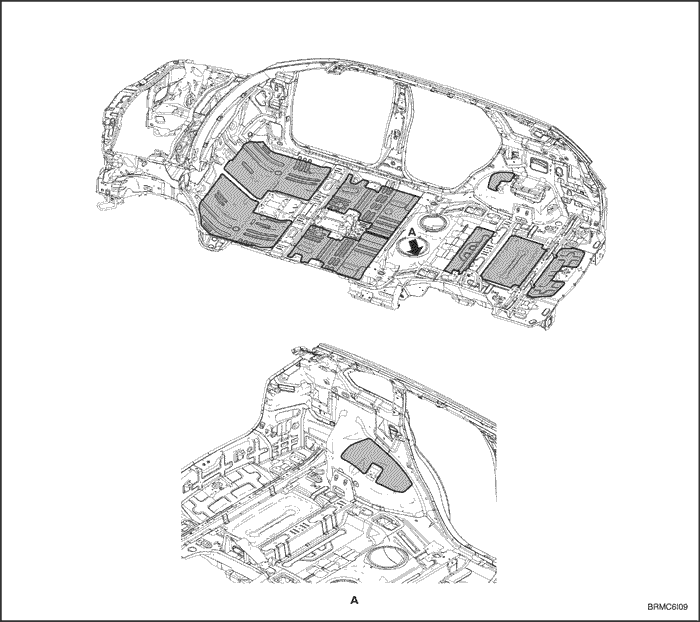
DEADENER
GENERAL DESCRIPTION
Deadener is properly designed and applied for reduce the vibration and noise. Also, it plays in maintaining the structural rigidity of the panel.
REPAIR PROCEDURE
- Remove the related parts.
- Seats, carpet.
- Trims, others.
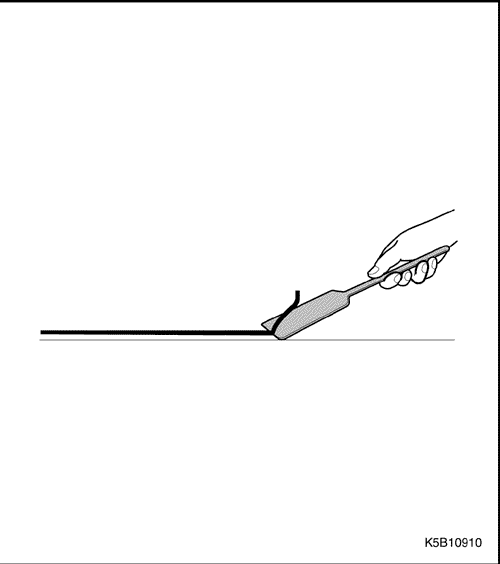
- Removal of the damaged deadener.
- Peel off the damaged deadener with a steel spatula,carefully.
- Clean and dry.
- Before applying the deadener, thoroughly clean anddry the areas to be applied.
- Prelocation the new deadener on the panels to beapplied.
Note : Avoid the parts mounting holes and serviceholes.
- Adhension of deadener.
- Heat the surface of deadener with a torch or heating gun until it adheres itself.
- Push and adhere to the panel with a rubberspatula.
Note : In order to take full advantage of the deadener,its face must adhere and contact the panels perfectly.
Caution : Be careful not to burn the composite partswhen beating.


- Install the related parts.
- Install in the reverse order in which they were removed.
FLOOR PANEL
PLENUM AND ROOF PANEL