Captiva | ||||||||
| ||||||||
Operation | Tools/Materials | Procedure | Remarks |
1. Prep the repairarea. | Double-action sander,#80 sandpaper. | Sand the area with a double-actionsander and #80 sandpaper.Clean with wax and grease remover. | . |
2. Apply putty Note : Putty canbe applied afterpriming as described in step 4. |
Epoxy-based putty. |
Apply in several thin coats if necessary. Try to avoid leaving pinholes inthe putty. | . |
3. Sand and clean theputtied area. | Double-action sander, orbitalsander, hand sanding file, #80,#120, #240 sandpaper, wax andgrease remover, shop towels. | Rough-sand the area with a double-action sander and #80 sandpaper,then sand with #120 sandpaper.Featheredge with #240 sandpaper.Clean with wax and grease remover. | . |
4. Coat with primer. Note : Apply tobare sheet metaland puttied area. |
Epoxy-based primer and hardener, epoxy thinner. | Apply 2-4 coats, allowing sufficientflash time between coats. Force dry at 60-70∞C(140-158∞F) forat least 30 minutes. | Spray to athickness of30-35microns. |
5. Sand and clean thewhole area. | Double-action sander, #400sandpaper, wax and greasesremover, shop towels. | Sand the whole area to be repaintedwith a double-action sander and #400sandpaper. Blow off with compressed air. Cleanwith wax and grease remover. | . |
6. Coat the wholearea to be repainted with primer/surfacer. |
Polyester/urethane resin primer/surfacer. | Apply 2-4 coats, allowing sufficientflash time between coats. Force dry at 60-70∞C(140-158∞F) forat least 30 minutes. | Spray to athickness of30-35microns. |
7. Sand and clean thewhole area to berepainted. | Hand sanding file, double-actionsander, #240, #320, #400, #600sandpaper, wax grease andremover, shop towels. | Sand the repair area by hand with#240 sandpaper until it's level. Sandthe whole area to repainted with #320-600 sandpaper. Clean with wax and grease remover. | . |
8. Top-coat the wholearea to repainted. |
Acrylic urethane resin top coatpaint, hardener, and thinner. | Apply 2-4 coats, allowing sufficientflash time between coats. Force dry at 60-70∞C(140-158∞F) forat least 30 minutes. | Spray to athickness of40-50microns. |
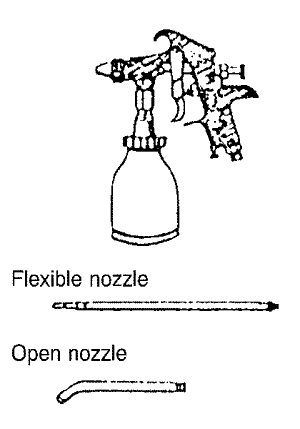
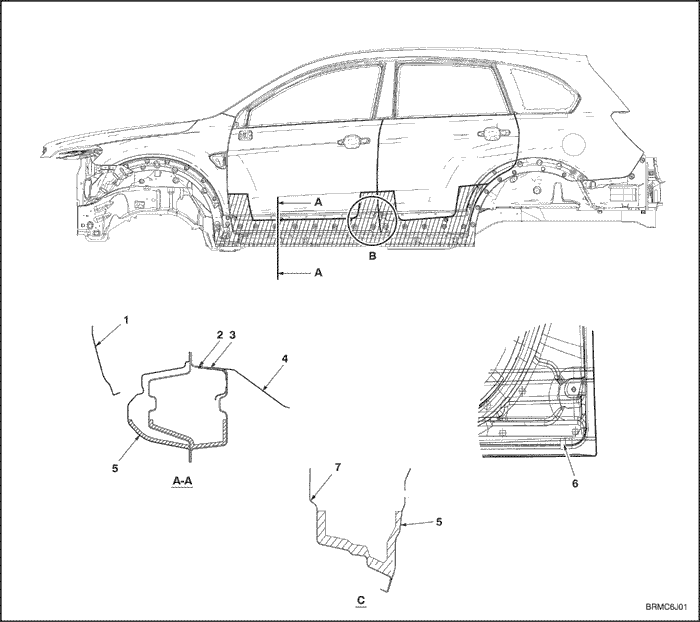
RUSTOP DEOX #100 WAXOYL | U.S.A. MARKET AUTO ARMOR 1031 (made by E.C.P) | To be applied to welded joints inside body panels. |
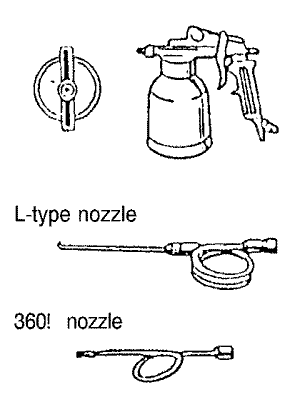
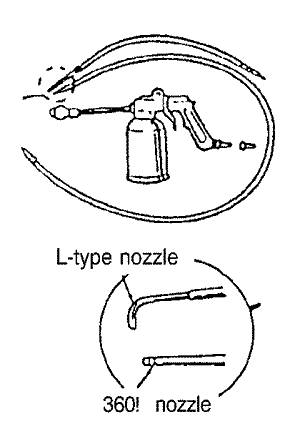
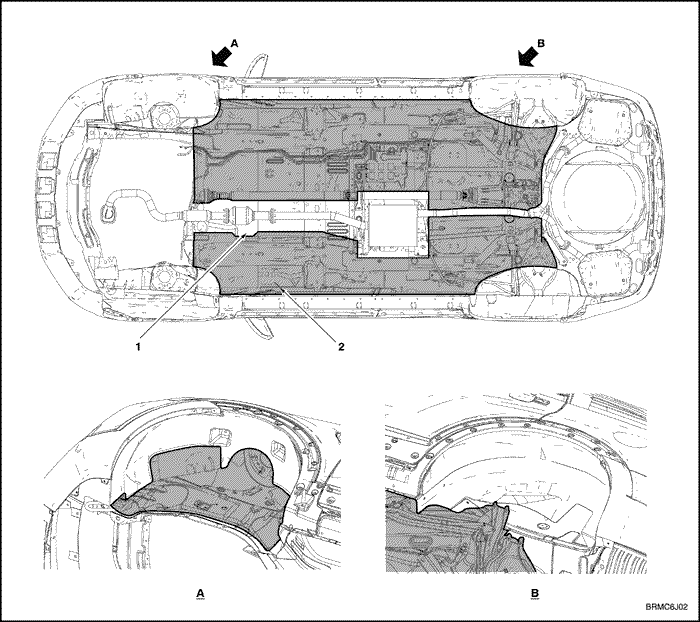
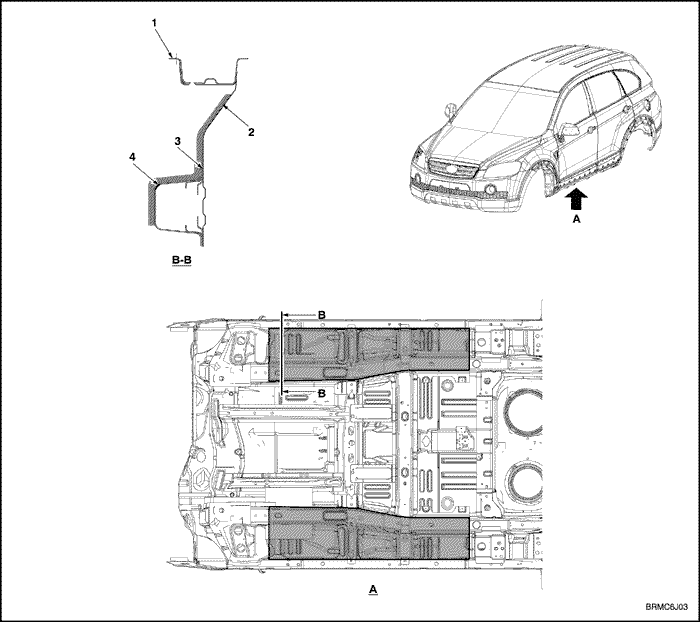
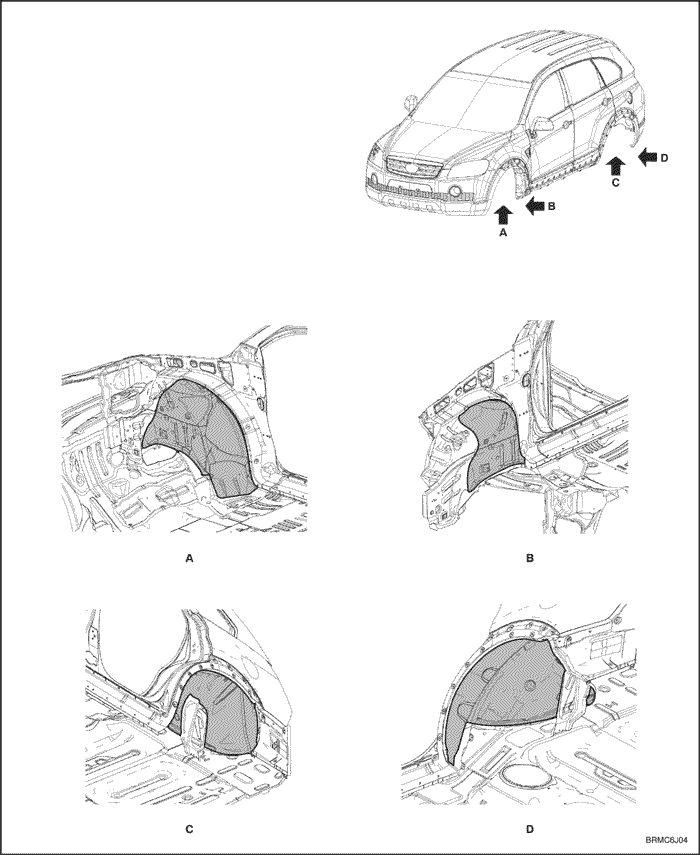
NOX-RUST 409-20S SOLTION 1000S | AUTO ARMOR OUTSIDE COATING (made by E.C.P) | To be appled to under floor and wheelhouse. |
For RUSTOP | DEOX#100 | For WAXOYL | For NOXRUST 409-20S/SOLTION 1000S |
 |  |  |  |
Protectors: Wear gloves, mask and suitable eye protection. | |||
| © Copyright Chevrolet Europe. All rights reserved |


