- Remove the related parts.
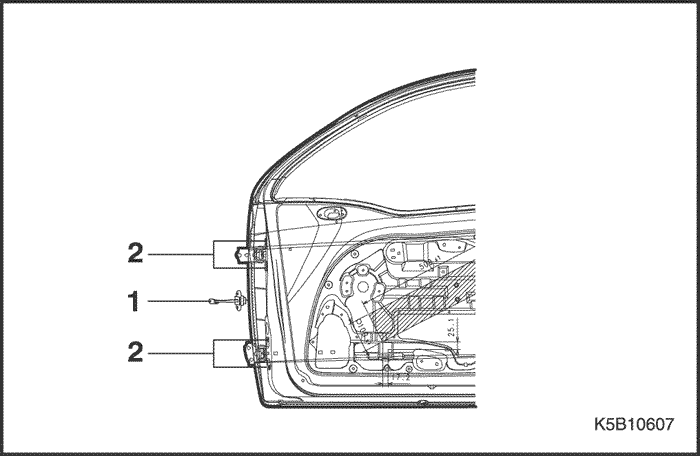
- Doors.
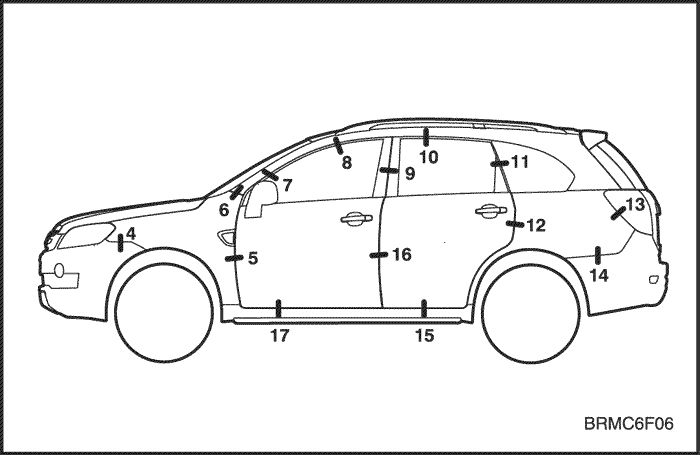
- Weather strips, pillar trims and related parts.
- Carpet.
- Seat belt assembly
- Door switch and wiring harness.
- Fuel pipe and brake oil pipe.
- Other related parts.
Note : Remove accroding to part damaged.
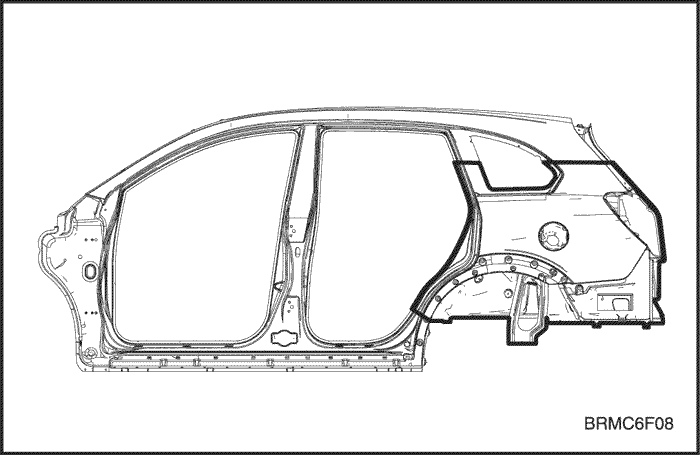
- Pull out and straighten the damaged area to approximately the original shape.
- Damage may extend to the inner roof frame, theinner frame door opening and the floor. Determinethe extent of the damage first, so the frame canbe pulled out properly.
Note : Use heat-resistant protective cover for protect painting areas, seats, carpets and other parts.
- Pull out and straighten the damaged areas.
- Do not pull out more than necessary.
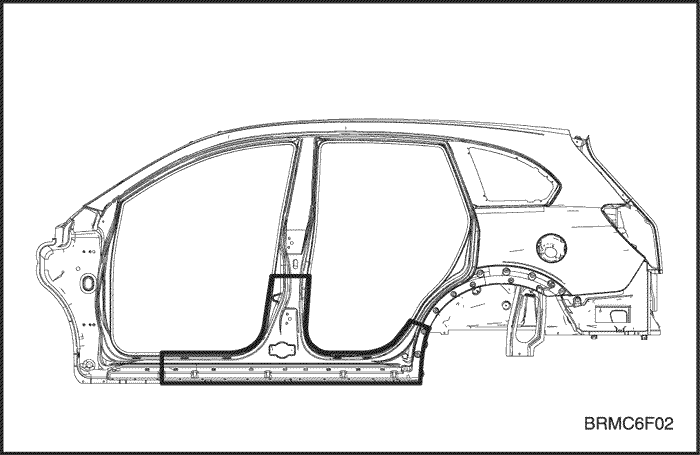
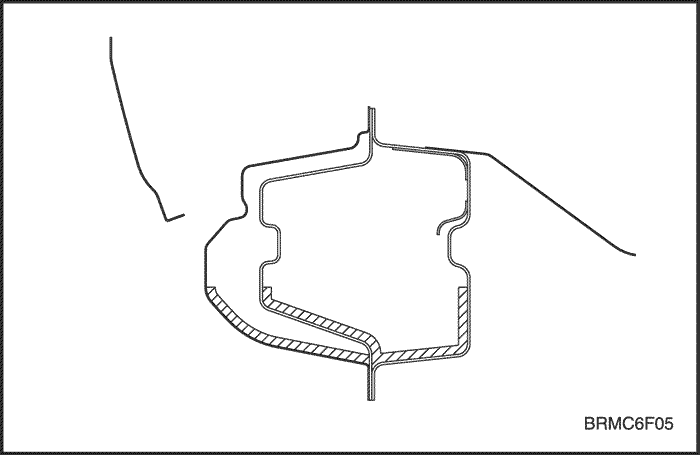
- Cut and pry off the frame door opening.
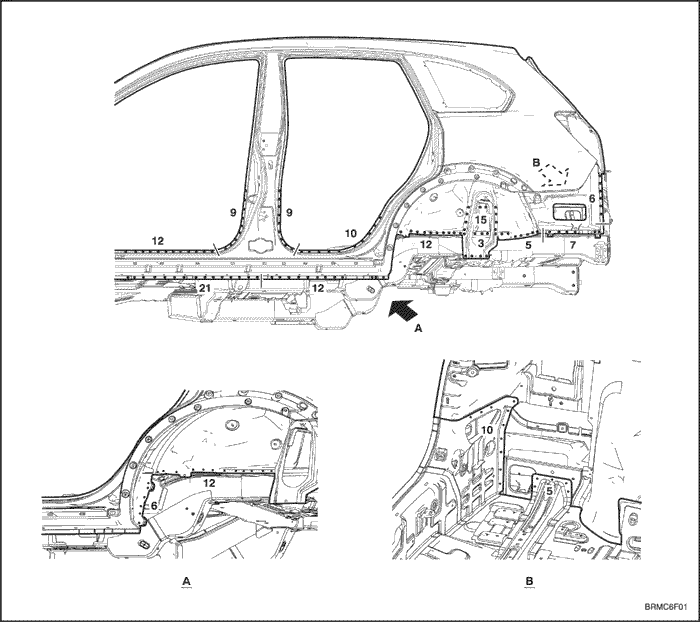
- Check the damage on the frame door opening, thencut the new frame door opening so it will overlapby 30mm(1.18in.) in the pillar, front and rear.
- Cut the damaged area with a hand saw along thebold line as shown.
Note : Be careful not to cut the inner panel. Thiscould result in extensive repair.


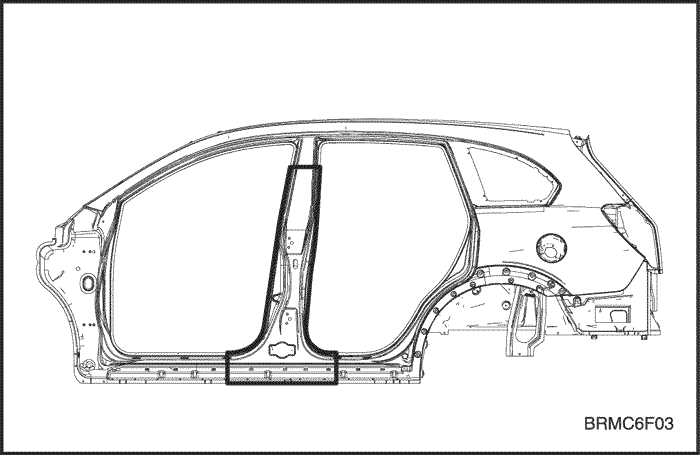
- If the damage involves part of the center pillar, cutthem as shown.
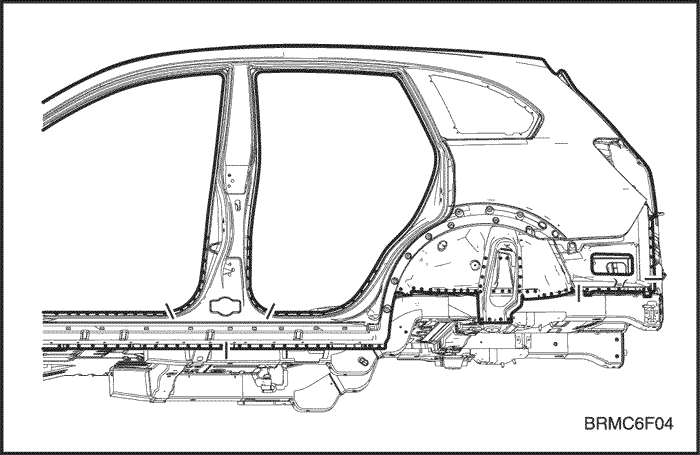
- Center punch around the spot weld imprints on thewelded flange.
- Use the special spot cutter to drill holes at thespot weld nuggets.
Note : When drilling holes be careful not to drill downto the inner panel..
- Pry off the frame door opening panel with an airchisel, leaving the welding flanges intact.
Caution : To prevent eye injury, wear goggles orsafety glasses whenever sanding, cutting, or grinding.
- Mold damaged related parts.
- Fill any holes drilled by welding.
Caution : To prevent eye injury and burns whenwelding, wear an approved welding helmet, glovesand safety shoes.
- Use a hammer and dolly to mold damaged areasof the remaining inner panel and even out thewelding flanges.
- Level and finish the burrs from the pried off spotwelds with disc sander.
- Sand off the paint and undercoat from both sidesof the flange to be welded.
- Set the new frame door opening.
- Grind both sides of the welding section of the prepared frame door opening part with a disk sanderto remove the paint and expose the steel plate.
- Clamp the new panel in place with the vise grips.
- Tack weld the clamped section for temporary installation.
Caution : To prevent eye injury and burns whenwelding, wear an approved welding helmet, glovesand safety shoes.
- Remove the vise grips and temporarily install thefender and doors, then check the clearances, leveldifferences and outer appearance.
- Perform the main welding.
- Weld the front, rear frame door opening and center pillar at the butt joints with a gas or MIGwelder.
- Spot weld the frame door opening and centerpillar as shown.
Caution : To prevent eye injury and burns whenwelding, wear an approved welding helmet, glovesand safety shoes.
- Perform a trial welding first, and check the welding condition.
- Increase the number of spot by 20% for areas tobe spot welded.
- Finish the welding areas.
- Level the gas or MIG welded areas with a discsander, then even out high areas with a hammerbeing careful not to deform them.
Caution : To prevent eye injury, wear goggles orsafety glasses whenever sanding, cutting, or grinding.
- Use a hammer and dolly to even out the spotwelded flanges for a close fit with the surface ofthe frame door opening panel.
- Fill in deformations and level differences of thewelded areas with solder or putty, then finish.
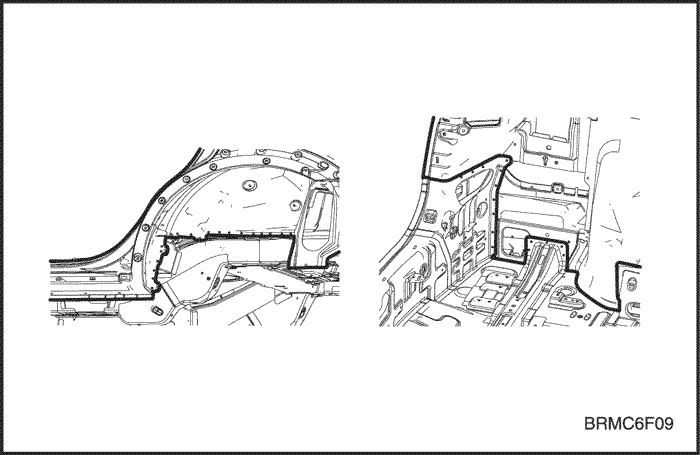
- Apply the sealer. Refer to Section 9, Sealing, Caulking and Deadener.
- Apply the sealer to the matching surfaces of thefloor and frame door opening.
- Apply the undercoat. Refer to Section 10, Rust Prevention.
- Undercoat to the front floor.
- Apply the paint.
Caution : Ventilate when spraying paint. Most paint containssubstances that are harmful if inhaled or swallowed. Read the paint label before opening paint container.
Caution : Avoid contact with skin. Wear an approved respirator, gloves, eye protection and appropriateclothing when painting.
Caution : Paint is flammable. Store in a safe place, andkeep it away from sparks, flames or cigarettes.
- Coating the anti-rust agents. Refer to Section 10, Rust Prevention.
- Coating the anti-rust agents to the inside of framedoor opening areas sufficiently.
- Install the related parts.
- Clean the passenger compartment.
- Wiring harness and related parts.
- Seat belt assembly and carpet.
- Trims and weather strips.
- Door and others.
- Install in the reverse order in which they were removed.
- Check and adjust.
- Check clearances and level differences.
- Check the door locking and unlocking condition.
- Check for water leaks in the passenger compartment.