Crankshaft and Bearing Installation
Special Tools
EN-45059 Torque Angle Sensor Kit
For equivalent regional tools, refer to Special Tools
Note: Inspect the installation position.
- Install the crankshaft bearing clips, oil bearing clips.
- Install the crankshaft.
Note: Inspect the installation position.
- Install the crankshaft bearing caps 1-4.
| • | Install the 8 NEW crankshaft bearing cap bolts. |
Note: Inspect the installation position.
- Install the crankshaft bearing cap.
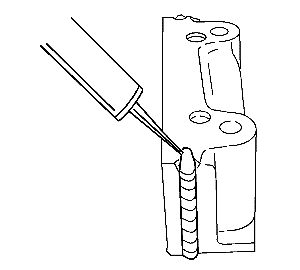
| 4.1. | Apply black adhesive sealing compound to the grooves of the rear crankshaft bearing cap. |
| 4.2. | Install the 2 NEW crankshaft bearing cap bolts. |
Caution: Refer to Fastener Caution in the Preface section.
Caution: Refer to Torque-to-Yield Fastener Caution in the Preface section.
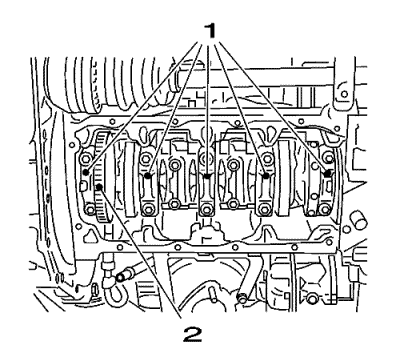
- Tighten the bolts for the crankshaft bearing caps (1) in 3 passes using the EN-45059 sensor kit:
| • | First pass to 50 N·m (37 lb ft) |
Note: Inspect the installation position.
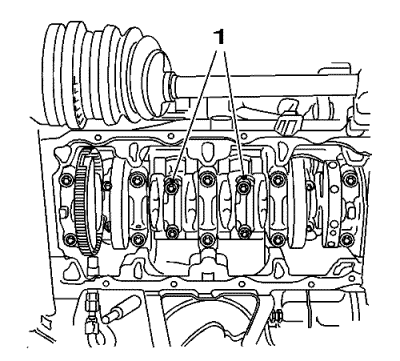
- Install the connecting big end bearing caps 2 and 3 (1) and oil the bearing clips.
- Install 4 NEW connecting rod bearing cap bolts and tighten in 3 passes use the EN-45059 sensor kit:
| • | First pass to 35 N·m (26 lb ft) |
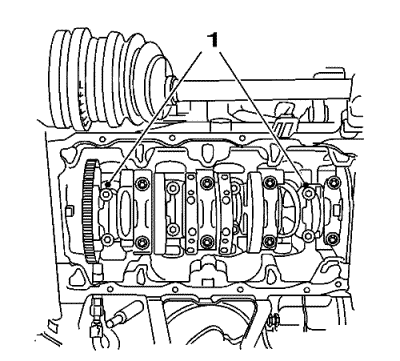
- Turn the crankshaft through 180°.
Note: Inspect the installation position.
- Install the connecting big end bearing caps 1 and 4 (1) and oil the bearing clips.
- Install 4 NEW connecting rod bearing cap bolts and tighten in 3 passes use the EN-45059 sensor kit:
| • | First pass to 35 N·m (26 lb ft) |
| © Copyright Chevrolet. All rights reserved |


